
Integrating Windows Admin Center (formerly Project Honolulu) with SquaredUp and SCOM 2016
Integrating Windows Admin Center (formerly Project Honolulu) with SquaredUp and SCOM 2016

Hello, I'm glad I was part of the insiders program with MS and SquaredUp and worked on this fantastic project. I have worked with SCOM for many many years and this is a phenomenal advancement on monitoring and server management. The usage of this extension its quite powerful as you can manage, troubleshoot any system from your browser. This integration enables you to Map every app (VADA/ServiceMap) and discover any dependencies and make sure your IT world is monitored and understood from any level (hardware all the way down to applications).
Before you start
- Make sure of the following items;
- Admin Center installer
- Shared folder from the SCOM server or any other file server
- SquaredUP extension pack
Installing the new Windows Admin Center

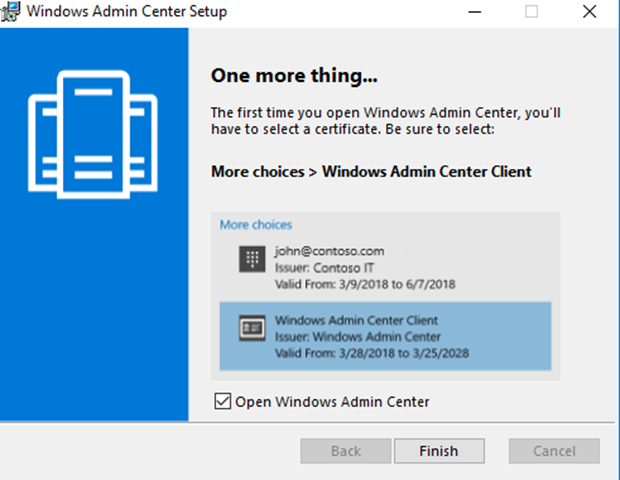

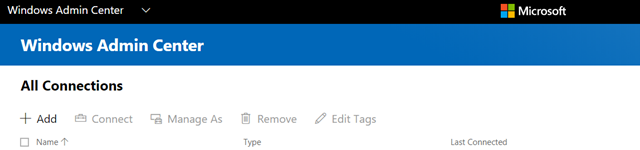
Windows Admin Center installed.
Installing the SquaredUp Extension
Go to the extensions menu and configure the package URL from the Extension Manager workspace.
Once URL its configured install the SquaredUp extension and that will do it.

Utilizing the extension
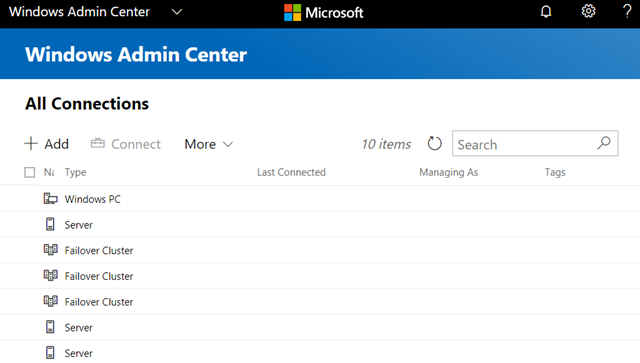
Configure your SCOM/SquaredUp site URL.
Cluster view

Server View

Integration and current server details.

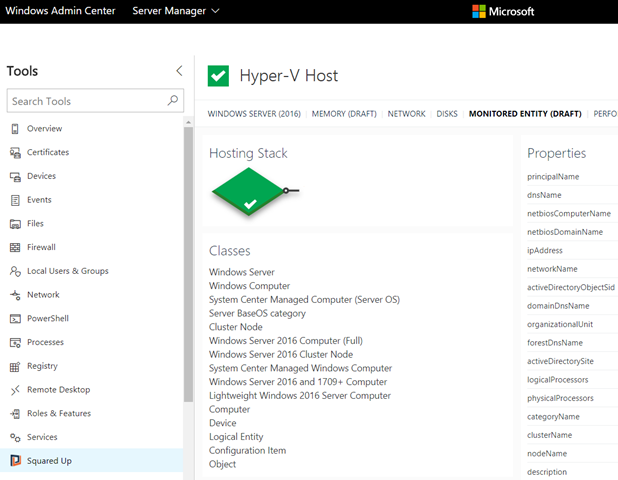
Service Map on the fly with VADA so you can discover what's interconnected with this system and what other applications could be affected.

That's it you have now deployed Admin Center and integrated with SquaredUp.
Please feel free to install your free copy and also getting the extension from the SquaredUp Team.
Update Rollup 2 for SCCM current branch, version 1710 is now available!
2016
,
Cloud and Datacenter Management
,
Configuration Manager
,
SCCM
,
SCCM 2016
,
System Center 2016
No comments

How to configure Nested Virtualization on Hyper-V 2016
Overview
Microsoft has released nested virtualization on Hyper-V 2016. Seems like it's making more sense as many Azure workloads might require this feature and also it facilitates Labs and any other testing without the need of having an actual physical host deployed. Windows Containers it's also another emerging feature as it allows you to virtualize within the virtualized roles.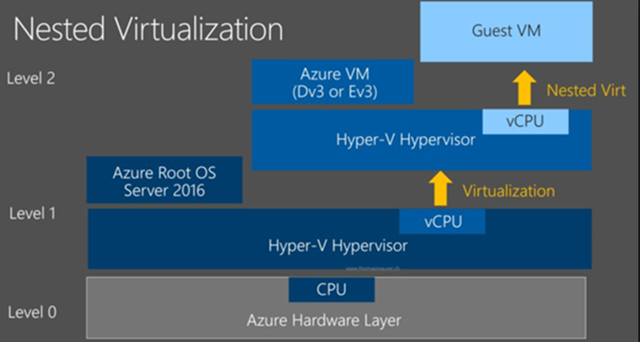
Applications
- Development, Testing, and Labs.
- Hyper-V Features required for VEEAM Proxy Servers.
- Never use for as a production solution, please refer to MS best practices.
- Others…
Requirements
- Hyper-V Role Installed on your Windows Server 2016 or Windows 10.
- A VM that will act as a VM/Virtualization Host running 2016.
How to enable?
Step by step
Go to the Hyper-V host and run the following command to verify if the Expose Virtualization Extensions are enabled by running the following PS command.Get-VMProcessor -VMName TESTHVHOST01| FL *
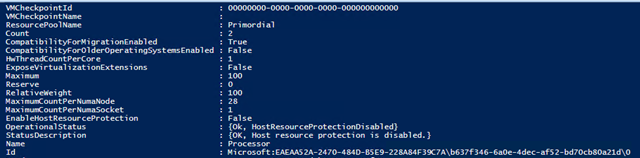
If not enabled then Power Off the VM and run the following command to enable Nested virtualization.
Set-VMProcessor -VMName TESTHVHOST01 -ExposeVirtualizationExtensions $true

Run the Get-VMProcessor -VMName TESTHVHOST01| FL * command and the value should have updated to True.

Installing the Hyper-V Role on Nested Windows Server 2016 VM
Follow below steps and then Install to get the services configured on your nested virtual host.


After installing the role and restarting the server, proceed to open the Hyper-V Manager.

Create a New nested Virtual Machine and specify its configurations then Finish.

After creating the VM you should be able to connect from your Hyper-V Virtual Host.
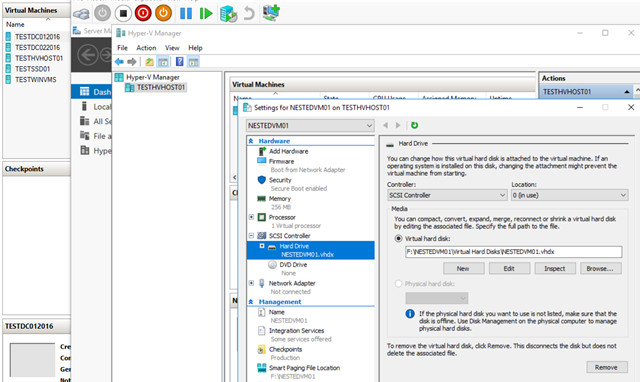
That's it, you have now deployed your first nested virtualization host.
How to configure DHCP for PXE Booting on WDS or SCCM 2012/2016 successfully
Cloud and Datacenter Management
,
Configuration Manager
,
SCCM 2016
,
System Center 2016
,
Windows Server
,
Windows Server 2016
No comments
How to configure DHCP for PXE Booting on WDS or SCCM 2012/2016 successfully
In this post, I will be performing the configuration for Configuration Manager SCCM 2016 PXE booting.Go to your DHCP server console and expand the scope you would like to set as your PXE subnet/network (In this case I will be enabling PXE to all scopes)
![clip_image001[4]](https://blogger.googleusercontent.com/img/b/R29vZ2xl/AVvXsEj5fsKwVJCxFgd54UFKC9dM054ILF4K5oe6RhPDFHAcQRYHcUSxIUuKv74aZE8OkJ1cFxxC595YPmXHaUtp6aN_NUnWQkgiW39l3wnWjMxuU7H2UWJvyH8nV-yBF7INYpHIvQ29_pcU5QaK/?imgmax=800 "clip_image001[4]")
On the Scope navigate to Server or Scope Options the configure new options 066 and 067.
On the Boot Server Host Name add the FQDN or IP for the PXE/WDS server
![clip_image002[4]](https://blogger.googleusercontent.com/img/b/R29vZ2xl/AVvXsEhw8qLw6LdgNUoaSo64_ZSJH-NyGpfBDBR5aeuxr6xg_DmQyIKcDbiKQTNdZyu-lY9ggj4U1OvdPyQ81Cf59IxtGdGUa9ysA31LURgAaoGQyzAVxgKrzvW5RQBuIv6SGQB_rcwJ72wLBJls/?imgmax=800 "clip_image002[4]")
On the Bootfile Name add SMSBoot\x64\wdsnbp.com for SCCM if WDS by itself then set Boot\x64\wdsnbp.com
![clip_image003[4]](https://blogger.googleusercontent.com/img/b/R29vZ2xl/AVvXsEhrf3Wdz52IyIOuZq8oRr8xBvnj-qohSOEhqvfSf4Edos53foAk_NeGt77CWmsMjUFNpGP2Uh0Gq92saIbbB3tAfzNbKNWF39dj5MshqX34g9L_0MOq5IaAfHclbfUiUKVjo6XmLmtLoTtp/?imgmax=800 "clip_image003[4]")
![clip_image004[4]](https://blogger.googleusercontent.com/img/b/R29vZ2xl/AVvXsEhG4dXeqmdCERNZ3aZbHHfEgEXNDQFXq-exvduxcqsml78hrr2LfSaQ8Amxhf6GFwq1Bro9f0LXD8pMVqncmNJj-RSfDz4g_nCFfBNrXYptOARMw8jNZZ6izVOKmFmVhXVRI5LSF6D07DRT/?imgmax=800 "clip_image004[4]")
On the Windows Deployment Services (WDS) Role Configurations
Set the Do not listen on DHCP ports![clip_image005[4]](https://blogger.googleusercontent.com/img/b/R29vZ2xl/AVvXsEilTjuEj3TT7xtzTY_d5Bz1nQ6wqhCoRWH-LHahNJ10RN8_TTGIn7QPAWU8nugvQUcw7gFnz7Thvc5JsQ2i3nxkNl6ZOftTTQ1aqBPSVH_2KDgn2uUV9Lrh3pbV4bFMIUJbpXFUyLE845Rg/?imgmax=800 "clip_image005[4]")
And also authorize this WDS server in DHCP
![clip_image006[4]](https://blogger.googleusercontent.com/img/b/R29vZ2xl/AVvXsEgqoVp3twPu7VXyMkO-joAPTlJRoK3_ttiDmpF4JAvynYsLmAXtF77UyZ33yTx2KQkzfc9c6GJFtHXXQ-XNRzZU7VN-BIsJzU2QUfYthFQfdk2VY9WL0e1WD6jEF9Q-UktSNtcMk4Z8Xnf_/?imgmax=800 "clip_image006[4]")
On your test machine boot up and press F12 to select boot option then select PXE or Network booting.
![clip_image007[4]](https://blogger.googleusercontent.com/img/b/R29vZ2xl/AVvXsEiFj67dQyQcTAOy5qmg-7BkrunjhGcIL2dFlFM-sN5trBfqHBAUHUBdn5J0QhIxBIULxh3dKQm0FU1Ll9OyJxIqabC9WdL7xWCFG4V3Ssh24A9eFkKk61f1NZ7bk8u7dyTM-RSwT4p06Wx_/?imgmax=800 "clip_image007[4]")
![clip_image008[4]](https://blogger.googleusercontent.com/img/b/R29vZ2xl/AVvXsEhJwNFsEViFR32YsZKstC_ifCNERrrr3i3VskTM7d96x5dZttSn99feSmWsc6cnWbu65gxSNlHzP0PoOYJ8bNqy20gwj6K2iDbTUvUjqQ3aKDY7dY6Hj9liGJ9wTfF5siDEfrRcA9zj70kp/?imgmax=800 "clip_image008[4]")
Now it's time to image your systems.
![clip_image009[4]](https://blogger.googleusercontent.com/img/b/R29vZ2xl/AVvXsEjdxaZ-xsE4bMaeO_j4dYRG_vA5UQ1hb0v94xoSGC6J3tTpk9MLlD6sRvA5bZf8viE1GlzbG8z7RLV0uWkDqYcg0J6YG0Y2pN_RZeJmsGMaR_grmIrt5i7dNdcyUJ4IfbsYG1_Rb6bkitlN/?imgmax=800 "clip_image009[4]")
That's it! You have now deployed PXE booting on your environment.
How to deploy Registry keys via SCCM Application Deployment with PowerShell Scripting successfully
How to deploy Registry keys via SCCM Application Deployment with PowerShell Scripting
Before you start
Create PowerShell Script and testedCreate Script Installer an Application
Testing machines preferably VM's
Powershell Script
After the script is created and tested place onto your shared Configuration Manager drive.
Create Manually specified application

Deployment Type
Make sure you fill in the General, Content, Programs, Detection Method, Requirements and any others.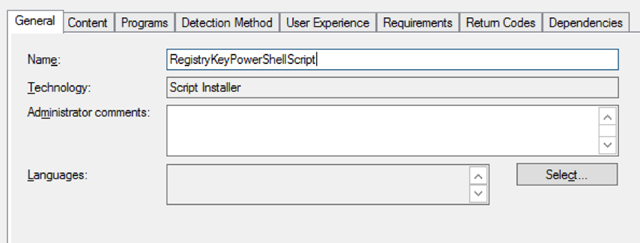
Programs
powershell.exe -ExecutionPolicy Bypass -File ".\RegistryKeys.ps1"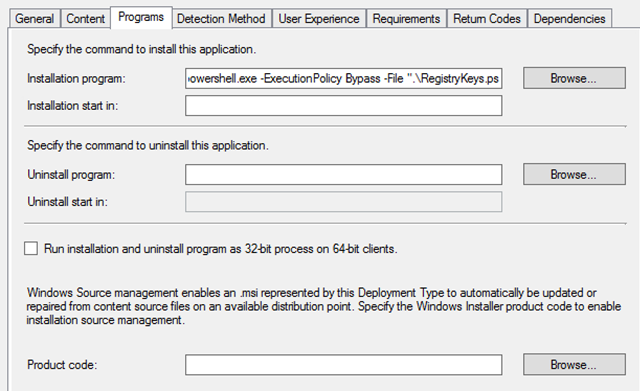
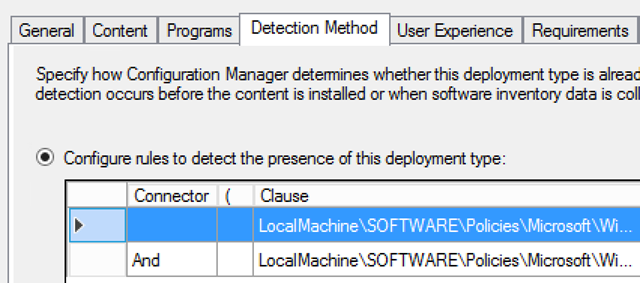
Detection Method
Registry Key
Powershell

Ok on the Deployment Type and then on the Application, to complete your application packaging.
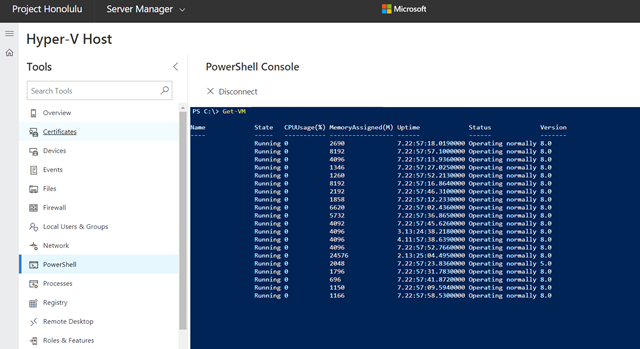
PowerShell on Project Honolulu, download the latest 1711 (Technical Preview) build
PowerShell on Project Honolulu download the latest 1711 (Technical Preview) build
I’m quite happy that Microsoft has updated Project Honolulu and added PowerShell on the very same HTML5 session. In my opinion, this is one of the greatest features of the project as I use it on daily bases.

Download link below:
https://www.microsoft.com/en-us/evalcenter/evaluate-windows-server-honolulu
I’m quite happy that Microsoft has updated Project Honolulu and added PowerShell on the very same HTML5 session. In my opinion, this is one of the greatest features of the project as I use it on daily bases.
Download link below:
https://www.microsoft.com/en-us/evalcenter/evaluate-windows-server-honolulu
My Experience Upgrading SquaredUP v3.2 to v3.3 on my SCOM 2016 Environment

Hello! This post it's to share with other ITPros about my experience on upgrading and utilizing SquaredUp v3.3. This tool has been a fantastic addition to our SCOM monitoring I have been doing SCOM since 2007 and I can tell I always wanted visualizations like these ones. SqauredUp allowed us to easily map applications and even VADA assist us with Microsoft Licensing which we were able to map SQL Servers and External Customers that were potentially not being compliant. I hope this can guide you and help you upgrade your environment in few simple steps.

Here's more Information about the download and what's new on this latest build https://download.squaredup.com/product-releases/squared-up-version-33/
What's new in Squared Up v3.3
- Revamped out of the box experience
- New Status Block tile
- VADA standalone discovery
- In-product notifications for updates, licensing and HA
- Expanded community dashboard pack catalog
A new QuickStart dashboard pack helps everyone get the best start with Squared Up and see the potential in SCOM.

New Status Block tile
A simple way to build high-impact status dashboards

VADA standalone discovery
Map an application with a new standalone entry point to VADA.
In-product notifications
Get notified of new product releases, license expiry and HA issues.
Expanded community dashboard pack catalogue
We’re busy migrating v2 community dashboards to v3. With some enhancements along the way.
- Configuration Manager 2012
- SharePoint 2010 & 2013
- Capacity Planning
- Exchange 2013 Mailbox Monitoring
- Hyper-V 2012 R2 (Native)
- PKI Certificates
- More…
Upgrading
Before you start:
- Download the latest build from here.
- Make sure your you apply this patch to your DEV/Test Environment first. If successful create a Change Request and deploy to Production.
Step by Step
- On your Management/SquaredUp IIS Web Server run the Squaredupv3.3.1 executable, on the Welcome page review and then Continue.

- On the License Agreement page, review and then click on Install.
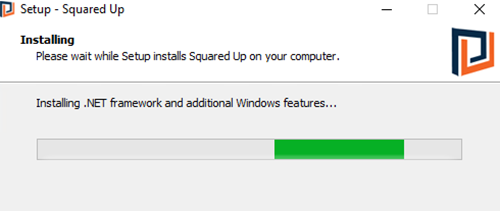
- On the Deployment page, Review an then continue to start the upgrade process.

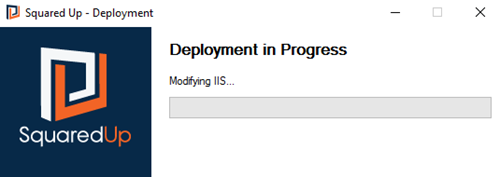
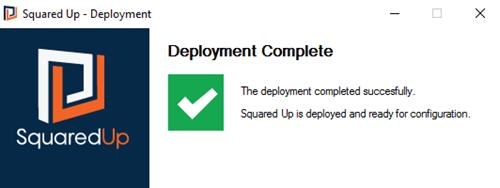
- After Upgrade its completed launch the portal, test functionality and then release to your teams.
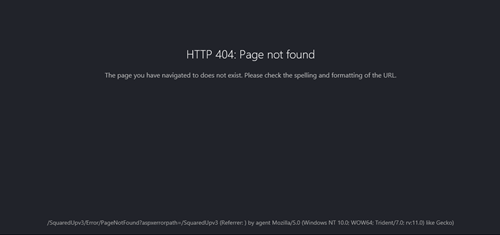

That's it! You have now updated SqauredUp to 3.3.1
Subscribe to:
Posts
(
Atom
)


