
How to Deploy Active Directory Federation Services (ADFS) on Windows Server 2019
Deploying Active Directory Federation Services (ADFS) on Windows Server 2019

ADFS 2019 had so many great features to facilitate and improve our deployments for more details see What's new in Active Directory Federation Services for Windows Server 2019
ADFS Requirements
This will be the setup on my lab, this might vary depending on your environment and needs.- One Application Server with Windows Server 2016
- One SSL Certificate CRS or AD Request Template
- Federation Services DNS name
- Service Account or Group Managed Service Account (gMSA)
- Domain Admin Permissions
Installing Active Directory Federation Services (ADFS) Role on Windows Server 2019
To install utilizing PowerShell (Preferred/Easier method)
- Open PowerShell as administrator and run the following command:
Install-windowsfeature adfs-federation –IncludeManagementTools

Installing via the Server Manager interface
- Open Server Manager console, then navigate to Manage and select Add Roles and Features:
- On the Before You Begin page, click Next.
- On the Installation Type page, Select Role-Based and Next.
- On the Server Selection page, Select ADFS Primary Farm Server and Next.
- On the Server Roles page, Select Active Directory Federation Services Role and Next.

- On the Features page, Next.
- On the ADFS overview page, Next.

- On the Confirmation page, click Install.
- On the Results page Review and Close.

Configuring the ADFS Primary Farm Server Role
- Open the Server Manager, navigate to the Flag Icon click and Select Post-Deployment Configuration for ADFS.

- On the Welcome page of the Configuration, wizard select Create the first federation server in a federation server farm and click Next.

- On the Connect to AD DS page, specify a Domain Admin account and Next.

- On the Specify Service properties page, Import/Select Certificate, Select Federation Service Name and Specify Federation Service Display Name then Next.

Note: In my case, I will import a CSR cert which will prompt for the password. For more details see Microsoft, How to enroll an SSL Certificate for ADFS

- On the Specify Service Account page, you can either Create a Group Managed Service Account (gMSA) or Specify an existing Service or gMSA Account.

- In order to enable set the KDS Root Key, proceed to login to one of your Domain Controllers and run the below PowerShell Command: Add-KdsRootKey –EffectiveTime (Get-Date).AddHours(-10)

- After the command is successfully run go back to your ADFS Server and go to the previous page and then Next.
- Select Create a Group Managed Service Account, enter the preferred name then Next.

- On the Specify Database page, select Create a Database on this server Using WID and Next.

Note: you could also specify a SQL Server, make sure you have a sysadmin or a least dbcreator permissions. For more details see Microsoft https://docs.microsoft.com/en-us/windows-server/identity/ad-fs/deployment/configure-a-federation-server.
If using a gMSA then you will need to pre-create gMSA Account via PowerShell unitizing the following script:
#User at your own risk :)
#Define gMSA account name.
$gMSA_Account = 'ADFS_gMSA_Farm'
#gMSA DNS Name.
#gMSA Servers Group Name (Optional, you could pre-stage servers that will need to retrieve the passwords such as SQL)
$gMSA_ServersGroupName = 'gMSA_ADFS_Farm_Group'
#Create new gMSA Account
New-ADServiceAccount -Name $gMSA_Account -DNSHostName $gMSA_FQDN -PrincipalsAllowedToRetrieveManagedPassword $gMSA_ADFSServersGroup
- On the Review Options page, Review and Next.
- On the Pre-requisite Checks page, review and click Configure.

- On the Results page, review any warnings and close.

Verify ADFS Services
- Open the Event Viewer and navigate to the ADFS View and search for the Event ID 100.

- Verifying SSO
- Run the following PowerShell Command
- Set-AdfsProperties -EnableIdPInitiatedSignonPage $true
- Browse to the ADFS sign-in page and test authentication. https://federationservicename/adfs/ls/idpinitiatedsignon.htm

References
ADFS Deployment https://docs.microsoft.com/en-us/windows-server/identity/ad-fs/ad-fs-deploymentI hope you've found this article helpful, have a nice day and thank you for reading. :)
How to configure SCOM HTML Notification Alerts from Orchestrator 2012/16 Step by Step
How to configure SCOM HTML Notification Alerts from Orchestrator 2012/16 Step by Step

This post is another great option that could be quite effective when you are notifying your engineers/application owners. This type of email formatting will allow them to easily read and take appropriate actions to correct the reported issues instead of trying to translate a very complicated and non organized text.

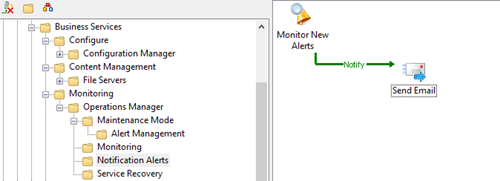

On the SCOM Alert Monitoring Activity, add Title, SCOM connection, the trigger for New alerts and your needed filters.
Note: If you are looking for a closed alert email then you will need to select the Updated alerts trigger and status closed.

On the Send Email Activity, set the Title and Message Format to HTML.

On the Details Page Subject section, set your Subject details and subscribe to your monitoring data so you can dynamically display the alert name/instance.

On the Details Page Recipients section, set the email accounts that will be receiving this notification.

On the Details Page Message section, copy and paste the HTML formatted code you’re your published data IDs.
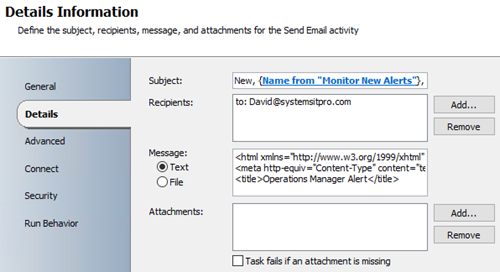
While working with your message you can also expand to have a better view of the HTML code.

Review your code and test with Notepad++ or Visual Studio then proceed to configure your SMTP/email channel.
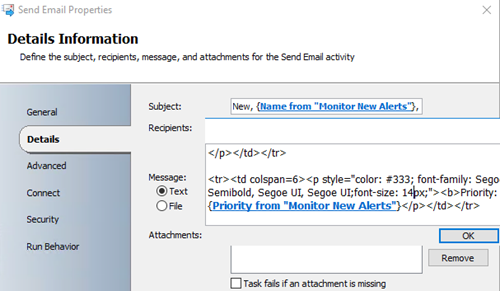
On the published data you can add the needed fields to the message section select them all, copy and paste them into a notepad to get the actual ID which its way easier to add into your HTML code.


On the Connect page, set your Email address and SMTP connection.

Close all the activities and Check in the Runbook.

Here’s the email design that you will be sending out, feel free to customize and comment with your updates
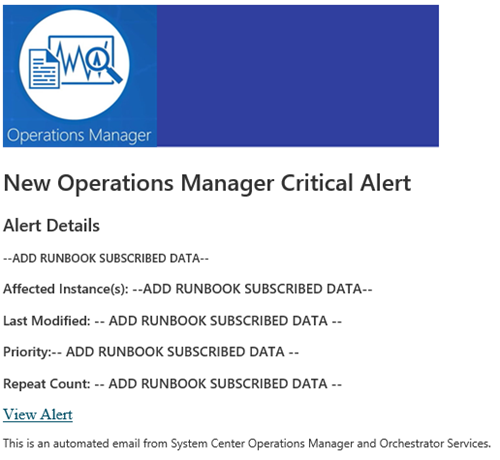
Hope this post was helpful and makes your IT life a bit easier
This post is another great option that could be quite effective when you are notifying your engineers/application owners. This type of email formatting will allow them to easily read and take appropriate actions to correct the reported issues instead of trying to translate a very complicated and non organized text.
Before you start
- Make sure you have the SCOM Orchestrator integration pack installed and configured.
- Make sure your credentials and Orchestrator have access to your SCOM environment.
Creating the Runbook
On Orchestrator Runbook Designer Console, create a new Runbook and add the following activities;- Monitoring Alerts
- Email Activity
On the SCOM Alert Monitoring Activity, add Title, SCOM connection, the trigger for New alerts and your needed filters.
Note: If you are looking for a closed alert email then you will need to select the Updated alerts trigger and status closed.
On the Send Email Activity, set the Title and Message Format to HTML.
On the Details Page Subject section, set your Subject details and subscribe to your monitoring data so you can dynamically display the alert name/instance.
On the Details Page Recipients section, set the email accounts that will be receiving this notification.
On the Details Page Message section, copy and paste the HTML formatted code you’re your published data IDs.
While working with your message you can also expand to have a better view of the HTML code.
Review your code and test with Notepad++ or Visual Studio then proceed to configure your SMTP/email channel.
On the published data you can add the needed fields to the message section select them all, copy and paste them into a notepad to get the actual ID which its way easier to add into your HTML code.
On the Connect page, set your Email address and SMTP connection.
Close all the activities and Check in the Runbook.
Click here to Download the actual HTML code and image.
Here’s the email design that you will be sending out, feel free to customize and comment with your updates
Hope this post was helpful and makes your IT life a bit easier
Integrating Windows Admin Center (formerly Project Honolulu) with SquaredUp and SCOM 2016
Integrating Windows Admin Center (formerly Project Honolulu) with SquaredUp and SCOM 2016

Hello, I'm glad I was part of the insiders program with MS and SquaredUp and worked on this fantastic project. I have worked with SCOM for many many years and this is a phenomenal advancement on monitoring and server management. The usage of this extension its quite powerful as you can manage, troubleshoot any system from your browser. This integration enables you to Map every app (VADA/ServiceMap) and discover any dependencies and make sure your IT world is monitored and understood from any level (hardware all the way down to applications).
Before you start
- Make sure of the following items;
- Admin Center installer
- Shared folder from the SCOM server or any other file server
- SquaredUP extension pack
Installing the new Windows Admin Center

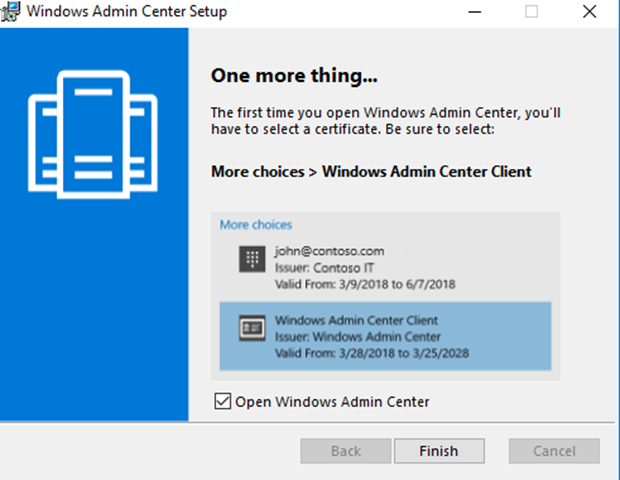

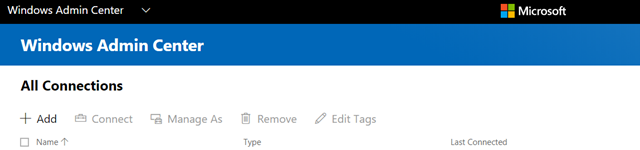
Windows Admin Center installed.
Installing the SquaredUp Extension
Go to the extensions menu and configure the package URL from the Extension Manager workspace.
Once URL its configured install the SquaredUp extension and that will do it.

Utilizing the extension
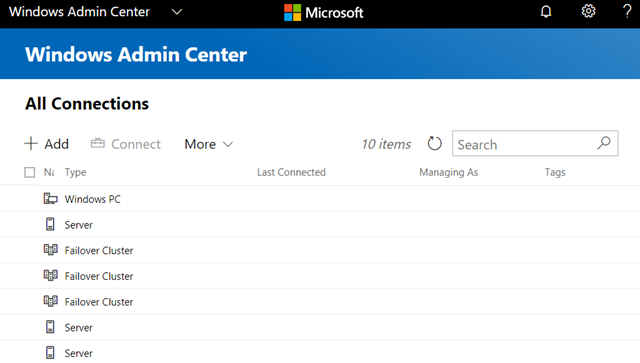
Configure your SCOM/SquaredUp site URL.
Cluster view

Server View

Integration and current server details.

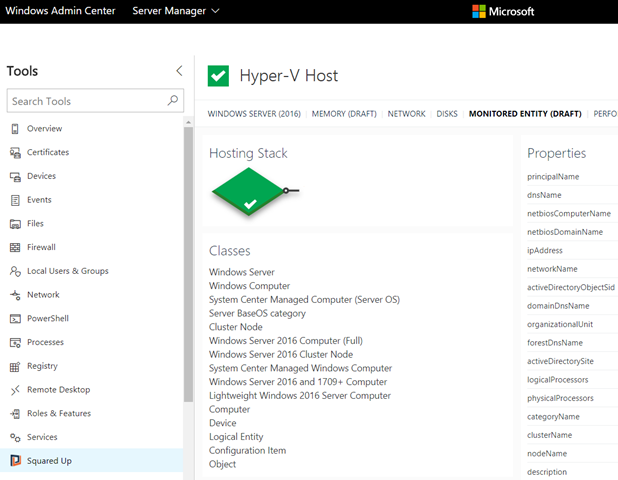
Service Map on the fly with VADA so you can discover what's interconnected with this system and what other applications could be affected.

That's it you have now deployed Admin Center and integrated with SquaredUp.
Please feel free to install your free copy and also getting the extension from the SquaredUp Team.

Subscribe to:
Posts
(
Atom
)


